Learn tennis slice serve
In 4 steps to the perfect tennis slice serve as a beginner
In 4 steps to the perfect tennis slice serve as a beginner
The slice serve is a variation of the tennis serve. The aim of the slice serve is to give the tennis ball a sideways spin and not the highest speed, so that the ball bounces sideways when it reaches the opponent’s side.
The sideways bounce makes it more difficult for the opponent to return the return to the court. For this you have to consider a few small things compared to the normal serve movement.
One thing first: It’s always worth putting training time into the serve, since it’s the only stroke you can dictate freely. In the following, we explain to tennis beginners the 4 steps to the perfect tennis slice serve: from the serve grip, to the backswing, the motion sequence to the outswing.
1. Tennis slice serve grip
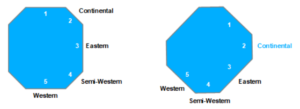
For a slice serve, similar to the normal straight serve or the kick serve, the so-called Continental grip is a good choice.

The type of serve you play depends not on the grip but on the way you toss the ball and the way you move.
2. Tennis slice serve backswing
As always, you stand behind the baseline on the left or right side of the center line and are turned sideways to the net. As a right-hander, your left foot is approximately parallel to the baseline.
Your upper body is also turned sideways to the net and you stand wide-legged and comfortable. This starting position gives you a stable stance for the serve.
The swinging motion is identical to the normal serve until the ball is tossed.
As a right-handed player, the tennis ball is in the left hand. Many players let the ball bounce on the ground again to be able to concentrate fully on the serve.
You bring the tennis racket in front of your body and the tennis ball and the tennis racket touch each other with outstretched arms. The tip of the racket points in the direction of the service court and off you go: you drop the tennis racket from the front downwards while the arm remains stretched. You swing the racket back up from the net in the opposite direction.
Both arms are still extended and go parallel – with the open palms – upwards. The weight is shifted to the back foot at the same time.
Then you toss the tennis ball up with an outstretched arm – but to play a slice serve slightly offset to the right front if you are right-handed or to the left front if you are left-handed – while the arm with the tennis racket bends so that the tennis racket feels like it is being put into an imaginary backpack. The hand without the racket remains directed upwards towards the ball and stabilizes your movement.
In addition, you bend your knees on both sides – a little lower on the back foot.
3. Tennis slice serve movement
For the perfect movement of the serve, the hitting arm is then accelerated upwards and you wipe the ball sideways as it falls down – not as it rises – in full extension and thus at the highest possible point in front of the body. If you are right-handed, you wipe more to the right of the ball and if you are left-handed, you wipe more to the left of the ball. The hand directed at the ball is at that moment already on the way down again.
Your weight is shifted forward from the back foot through complete knee extension to get even more power out of the serve. Shortly before the point of impact of the tennis ball, additionally snap your hitting arm wrist to the side, so that a little extra spin is mobilized here as well.
4. Tennis slice serve outswing
For the outswing of the slice serve, continue the natural motion sequence: swing the tennis racket down past the other side of your body and take the 2nd hand back to the racket handle and move to the center of the court or starting position.
Again, note that the backswing, motion sequence and outswing is a fluid motion.

